Start Up

When you open the 2.5D Toolkit window for the first time, the Startup panel provides two main entry points:

1. Start new scene
This section contains the commands required to initialize a new 2.5D environment. It sets up the project structure, creates a starting scene, and prepares the essential components needed by the toolkit.

2. Editor Tools
This section gives access to the core utilities used throughout the workflow:

  • 2D to 3D
  • Sprite Editor
  • Background Editor

Each tool can be launched independently, allowing you to prepare assets before creating the full scene.

Creating a New 2.5D Scene

When you create your first 2.5D scene, the toolkit automatically adds a VB25DTK GameObject to the Hierarchy.
It contains three child objects, each responsible for a specific part of the workflow:

  • VBAreaTK
    Stores all walkable and non-walkable areas drawn in the scene.
  • VBMeshTK
    Stores the mesh (or meshes) generated from those areas.
  • VBEngineTK
    Acts as the main runtime component. It contains the core logic, parameters, and scene-level data required by the toolkit (movement, scaling, scrolling, pan limits, and other engine features).

Configuring the Navigation System

After creating a new scene, make sure the Navigation system is correctly configured before drawing walkable areas.

If you are using a Unity version with the built-in Navigation window (e.g., 2021.3):

  • Open Window > AI > Navigation and go to the Agents tab.
  • Set the Agent Radius to 0.05.

If you are using a Unity version with the AI Navigation package (Unity 2022+ / Unity 6):

  • Select the VBMeshTK object and click Open Agent Settings. This will open the new Navigation panel.
  • Set the Agent Radius to 0.05.

Note:
Setting the Agent Radius to 0.05 ensures that the NavMesh agent matches the effective width of the walkable mesh generated by the toolkit. A larger radius may cause narrow paths, edges, or slope transitions to be marked as non-walkable during baking.

Initializing the Scene Setup

When the new scene is created, the following elements must be configured before you start working.

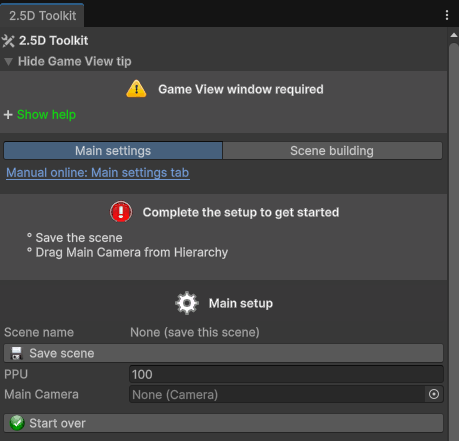
1. Save the scene with a proper name.
The toolkit uses the scene name to store all scene-related data.

2. Define the PPUs you want to work with.

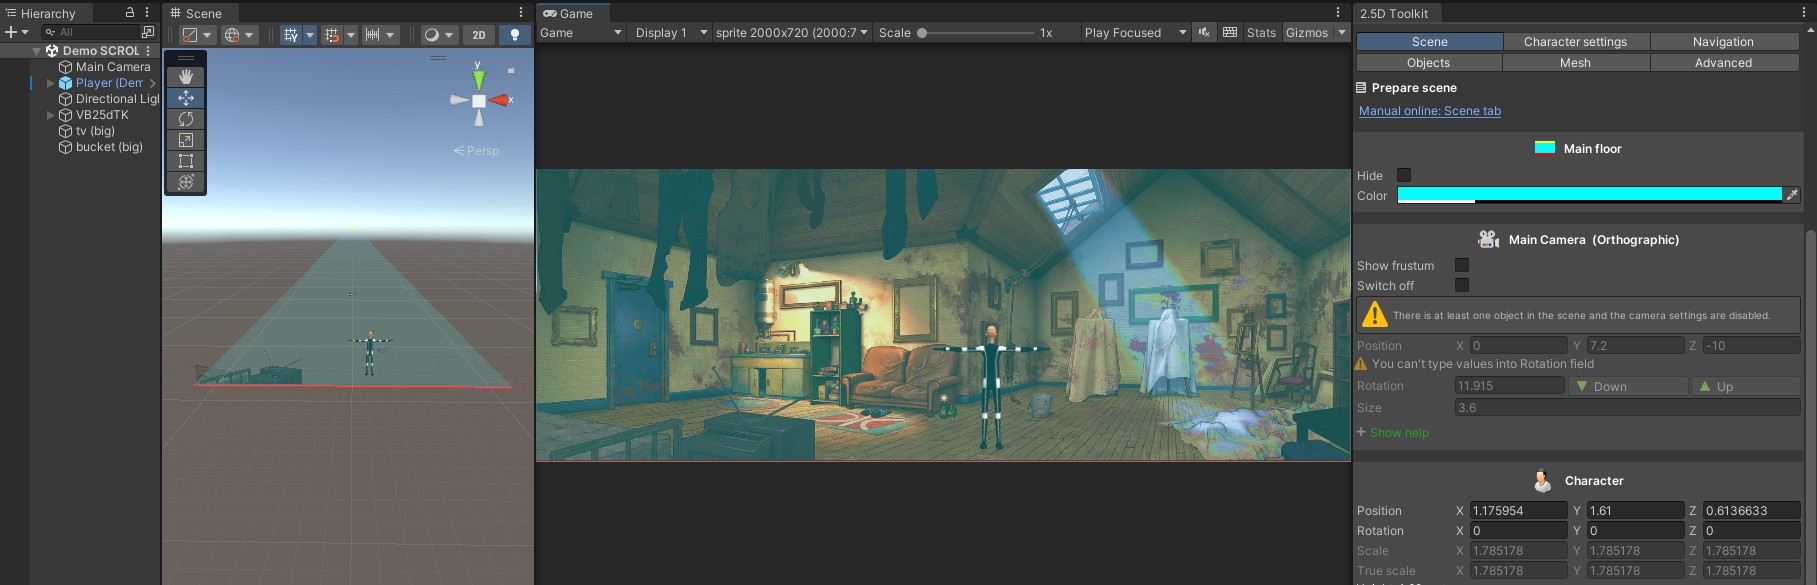
3. Assign the main Camera to its field in the editor.

4. Choose the projection mode: Perspective or Orthographic.

The interface is dynamic and automatically shows or hides options based on the selected projection mode and the steps you have completed so far.

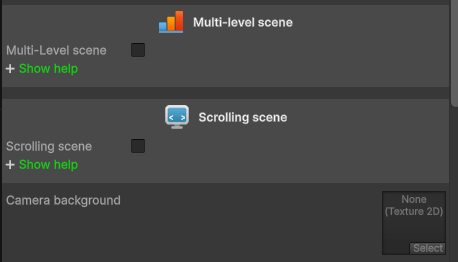
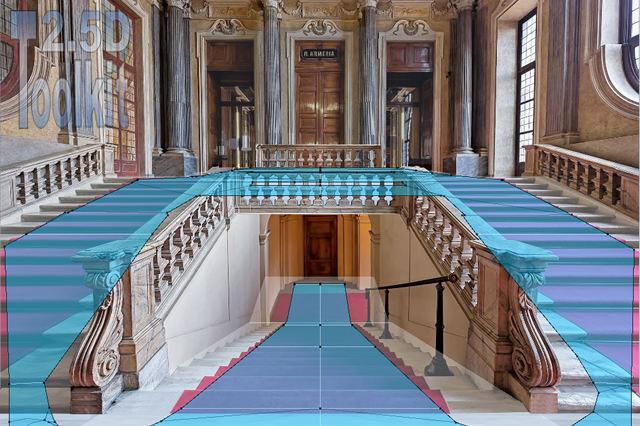
5. Enable Multi-Level Scene if your environment will include multiple height levels.
Available in Perspective projection.

6. Enable Scrolling Scene if you plan to use a horizontally scrolling background.

7. Assign the background image.

  • If Scrolling Scene is enabled, drag a Sprite.
  • If scrolling is disabled, provide a Texture for use with the background camera.

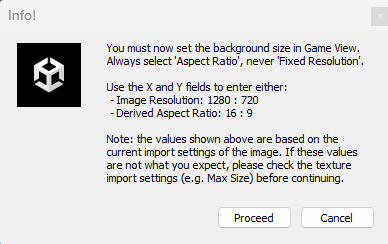
A popup will remind you to set the correct Game View resolution. The camera distance/size is adjusted automatically based on the image dimensions, so any sprites cropped from this image will not require scaling.

Note:
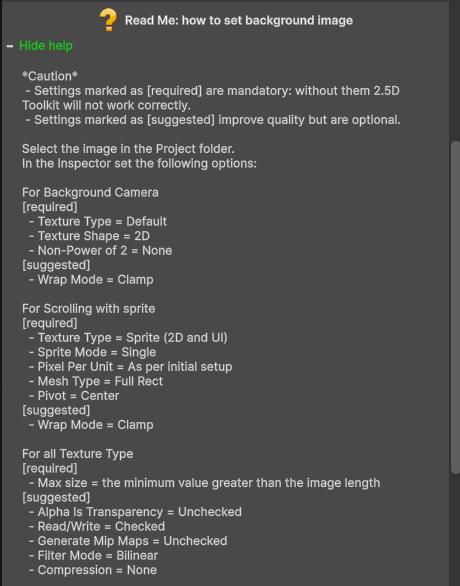
You can open the contextual help panel Read Me: How to Set the Background Image for detailed instructions on the required import settings.

8. Assign the test character (DefaultAvatar) by dragging it from 2.5dToolKit/Demo/3D Objects.
Instead of the DefaultAvatar, you may assign your own character model.
When a character is added for the first time, the toolkit automatically attaches the required control scripts.

If you prefer to use a custom character, make sure it initially includes only two components:

  • Animator
    Use 2.5dToolKit/Demo/Controller/AnimCtrl25dTK as the controller and keep Apply Root Motion disabled.
  • NavMesh Agent
    Set the Height value so it matches the actual height of your character.

Once the character is initialized, you can freely switch between NavMesh Agent movement and Root Motion directly from the editor.

You can now move to the Scene Building tab and start creating your scene.

Resetting the Scene

To start over from scratch, you can use the same menu option used to create a new scene.
This will re-initialize the scene to its default state.

Alternatively, you can click Start Over.
This option also clears the scene but preserves all settings you have configured so far, including the scene name, camera assignment, projection mode, and other initial parameters.