2D to 3D Tool

First of All

f you prefer to use your own character, make sure it includes only two components before initializing it:

  • Animator
    Assign the Assets/2.5dToolKit/Demo/Controller/AnimCtrl25dTK controller and keep Apply Root Motion disabled.
  • NavMesh Agent
    Set the Height parameter so it matches the actual height of your character.

Introduction

This tool is designed to automatically determine suitable camera settings for a 2D image and generate multiple possible 2.5D environments.
Before using it, it is useful to understand how the search scripts work.

The system does not try to return a single “correct” camera configuration.
Instead, it generates several valid environments, each corresponding to the parameters you provide.
This approach has a major advantage over scripts that output only one result.

Imagine that your image is a photograph taken with a FOV of 60.
As we know, 2.5D environments typically require a much lower FOV to prevent character distortion near the screen edges.
If a script only returned the original camera values, the environment would be technically correct, but the character would appear distorted – something we want to avoid.

The 2.5d Toolkit search scripts, instead, allow you to generate different environments with different FOV values and choose the one that best matches your artistic and gameplay needs.

We will soon see the steps required to perform a search, but first let’s summarize the process.

Note: This search works only with Perspective projection.

Overview of the Process

The search requires three simple inputs:

  1. Set the horizon line.
    This line must be placed at the farthest point the character will reach in the scene.
    If your scene contains multiple walkable areas, consider the farthest one.
  2. Draw a reference line.
    This line represents a real-world length (or an estimated one).
    It is extremely important because the scale of the entire environment will be based on it.
  3. Set the character height at two different positions.
    Choose two points in the scene and assign the character’s height at those points, based on visual references in the image (e.g., a bench, a door, a human figure).

All environments returned by the search will respect these three constraints.
For each FOV value – ranging from 60 down to 5 – the script iterates through all possible combinations of FOV and rotation, checking them against the defined constraints.
Whenever a configuration meets all conditions, it is stored as a valid environment.

Your task is then to review the found environments and select the one that best fits your needs. your needs.

Choosing the Final Environment

The goal is to identify the environment where the character walks along your reference line in a number of steps that falls within the recommended range suggested by the script.
This ensures the environment feels natural and realistic.

A helper script is also available to speed up the search phase. It is described shortly below.

Note: The toolkit includes three default search presets – fast, medium, and slow – but every parameter can be customized.

Demonstration

In the following example we use the POOLS demo image.
Leave PPU = 100, then drag the Main Camera, the background image, and the character into their respective fields.

Now go to the main menu and open the Scene Searching tab.
You can enable contextual suggestions here. It is recommended to turn them on the first time you use this tool.

Initialize the script by clicking Initialize Searching.
(A popup will warn you that the scene is about to be reset to its default values.)

The camera is initialized with a FOV of 5, a minimal height, and a rotation that places the horizon line at the highest point of the image.
We start from the lowest FOV because, as explained earlier, this prevents character distortion when the character moves near the sides of the image.

The Set Horizon option now appears on the right.
Set the horizon line at the farthest point of the walkable area you plan to draw later. If the character will not reach the center of the screen, set the value to zero.

Click Done, then New Line.

You are now in drawing mode. Draw a line whose length you either know or can reasonably estimate.

If possible, avoid placing the line too close to the extreme edges of the image.
During the next steps the character will walk along this line, and keeping some distance from the edges will make it easier to count the steps.

A new option now appears: Assign a length to the line.
As mentioned earlier, this value is crucial, as the search validates only configurations where the line matches this length.
In this example image, a value such as 10 meters is a reasonable estimate for the line.

Enter the desired measurement in the field, and the final option appears: Set character size at two different points.

Click Begin Resizing.

The character is placed in the scene and the scaling controls appear.

In this example image, there is no reliable reference object to determine the character’s height at the point closest to the camera, so we must estimate it.
Drag the character to a convenient location and set its height based on your assumption.

Keep in mind that we are working with a FOV of 5, so resizing the character requires maximum Scale Accuracy when the character is close to us and minimum Accuracy at the farthest point. Otherwise, the character would change size too quickly or too slowly.

Once the size is correct, click Store 1st Point.

Now move the character to the farthest point, or to any location that is convenient for assigning the second size value.
In this image, we can use the door at the bottom right as a reference.

Consider that there is a step in front of the door, so we need to keep the character’s height slightly lower than the highest point of the door.

Click Store 2nd Point.

The character returns to the starting position, and it cannot be moved manually at this stage unless you use the Goto Near Point or Goto Far Point buttons.

At this point, the search configuration options appear.

We can choose between three predefined settings: Less Accurate, Medium Accurate, and Very Accurate.
Regardless of the choice, all parameters can be customized.
At the bottom of this page – and also inside the asset’s 2Dto3D folder – you will find a legend that explains each parameter.

The recommended approach is to leave all settings at their defaults and start the search without modifying anything.
You should adjust the parameters only if the search returns zero environments, which usually happens when the assigned line length or the two character height values are not consistent with the perspective of the image.

Of course, you can change your initial search settings without restarting from scratch.
However, if you redraw the reference line, you will also need to re-enter the character height settings.

Now that the search parameters are set, click Start Searching.

A progress bar indicates the progress of the operation, and a short summary will appear when the search is complete.
If you have not modified the default parameters, the process is usually very fast – often just a few minutes, depending on your PC.

During the search, you will only see the background image; everything else is hidden.

Note: do not switch focus to other windows, as the search may pause, and do not select objects in the Hierarchy, as this may slow the process.

This is the result of our search:

For several different FOV values, a valid environment is found; in two cases, the script returns two environments.

Keep in mind that if the script finds multiple environments that are very similar, it stores the one where the character shows the smallest height difference between the two reference points you set.
This is the reason for the two entries under Character Range: Found and Best Values Stored.

Let’s open a few of these environments to understand the results.

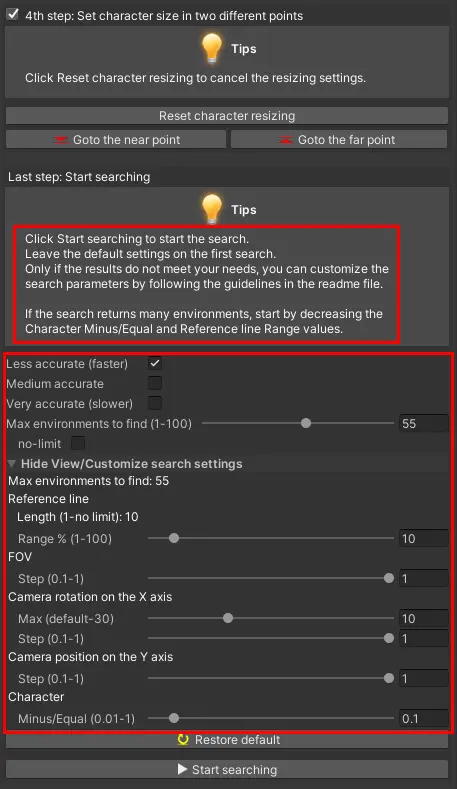
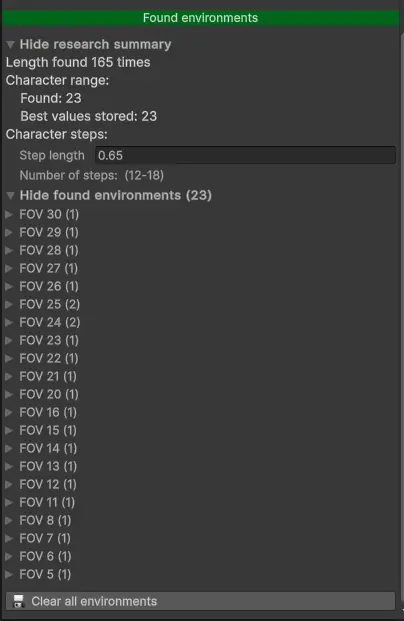
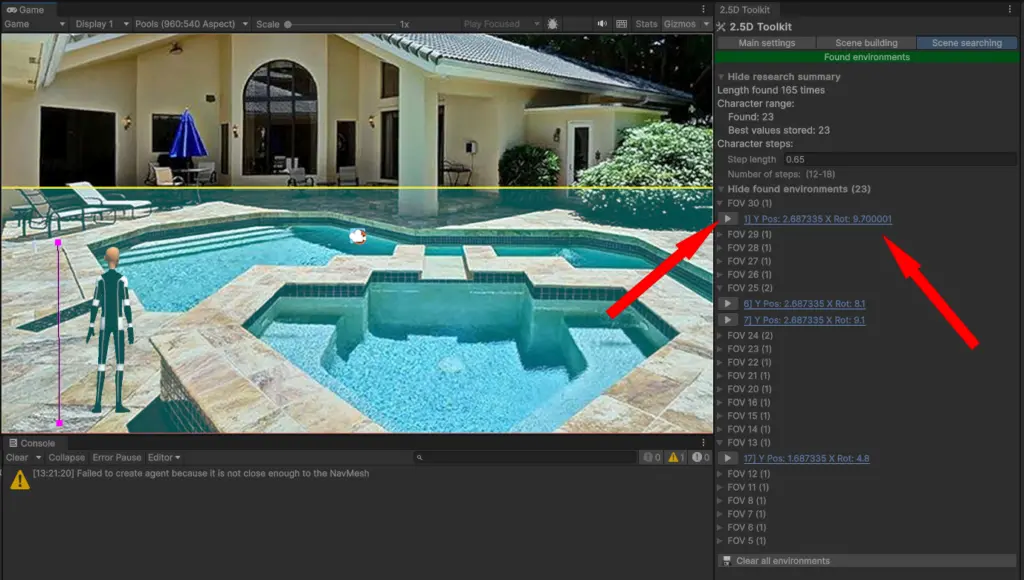
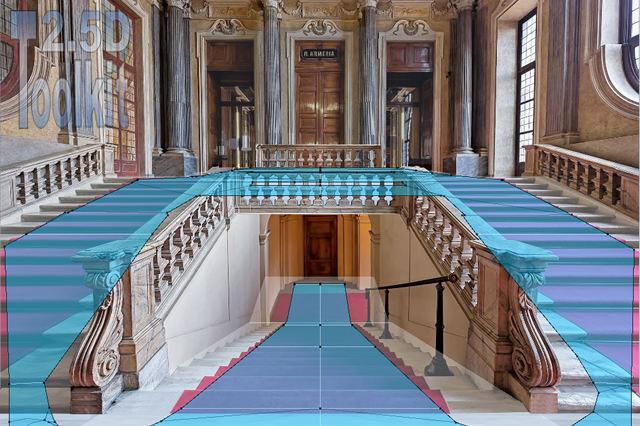
With a FOV of 30, our reference line measures approximately 10 meters.
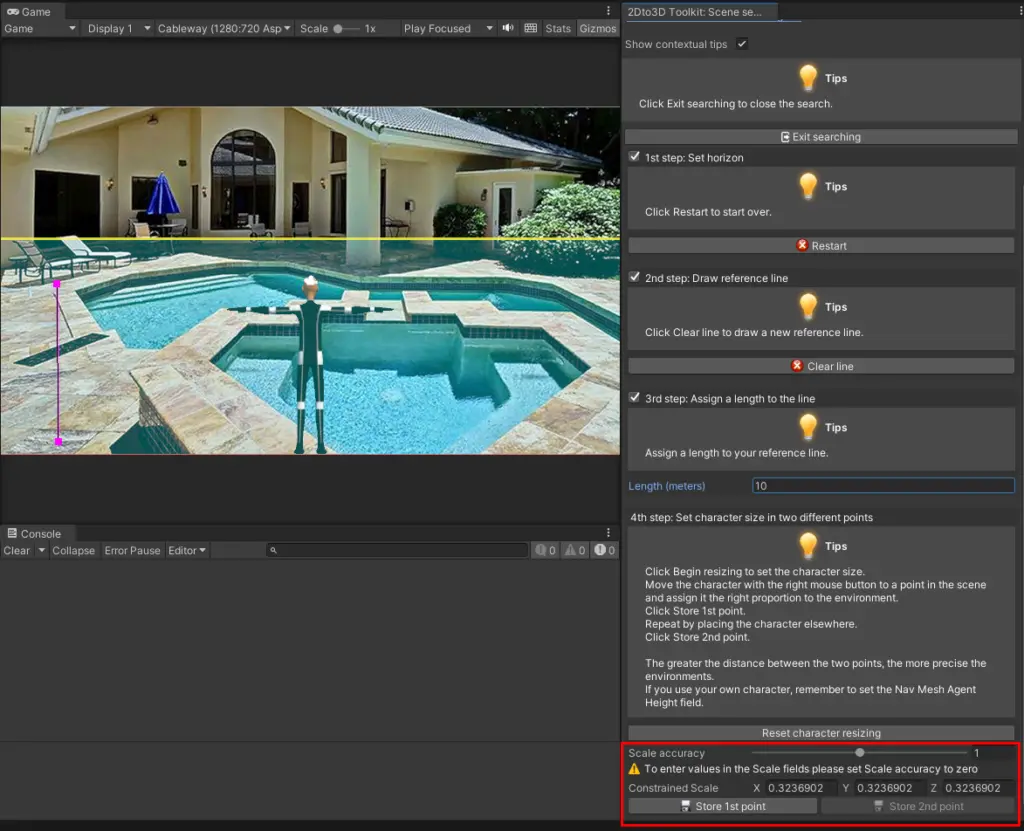
We kept the default tolerance, which allows the line to be 10% shorter or longer – that is, between 9 and 11 meters.

For an environment to be stored, the character must have a height difference between the near and far points that is equal to or below the threshold of 0.1.
A value of 0.1 is generally acceptable, but you can achieve more precision by lowering this value or reducing the percentage range of the reference line.

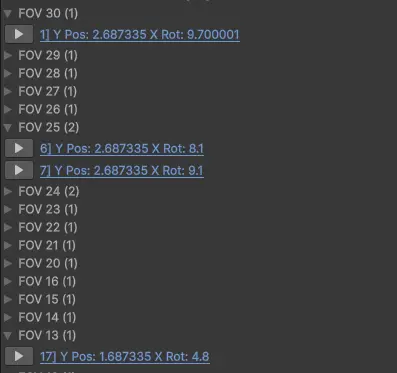
In this environment, the camera height is 2.68 and its rotation is 9.7.

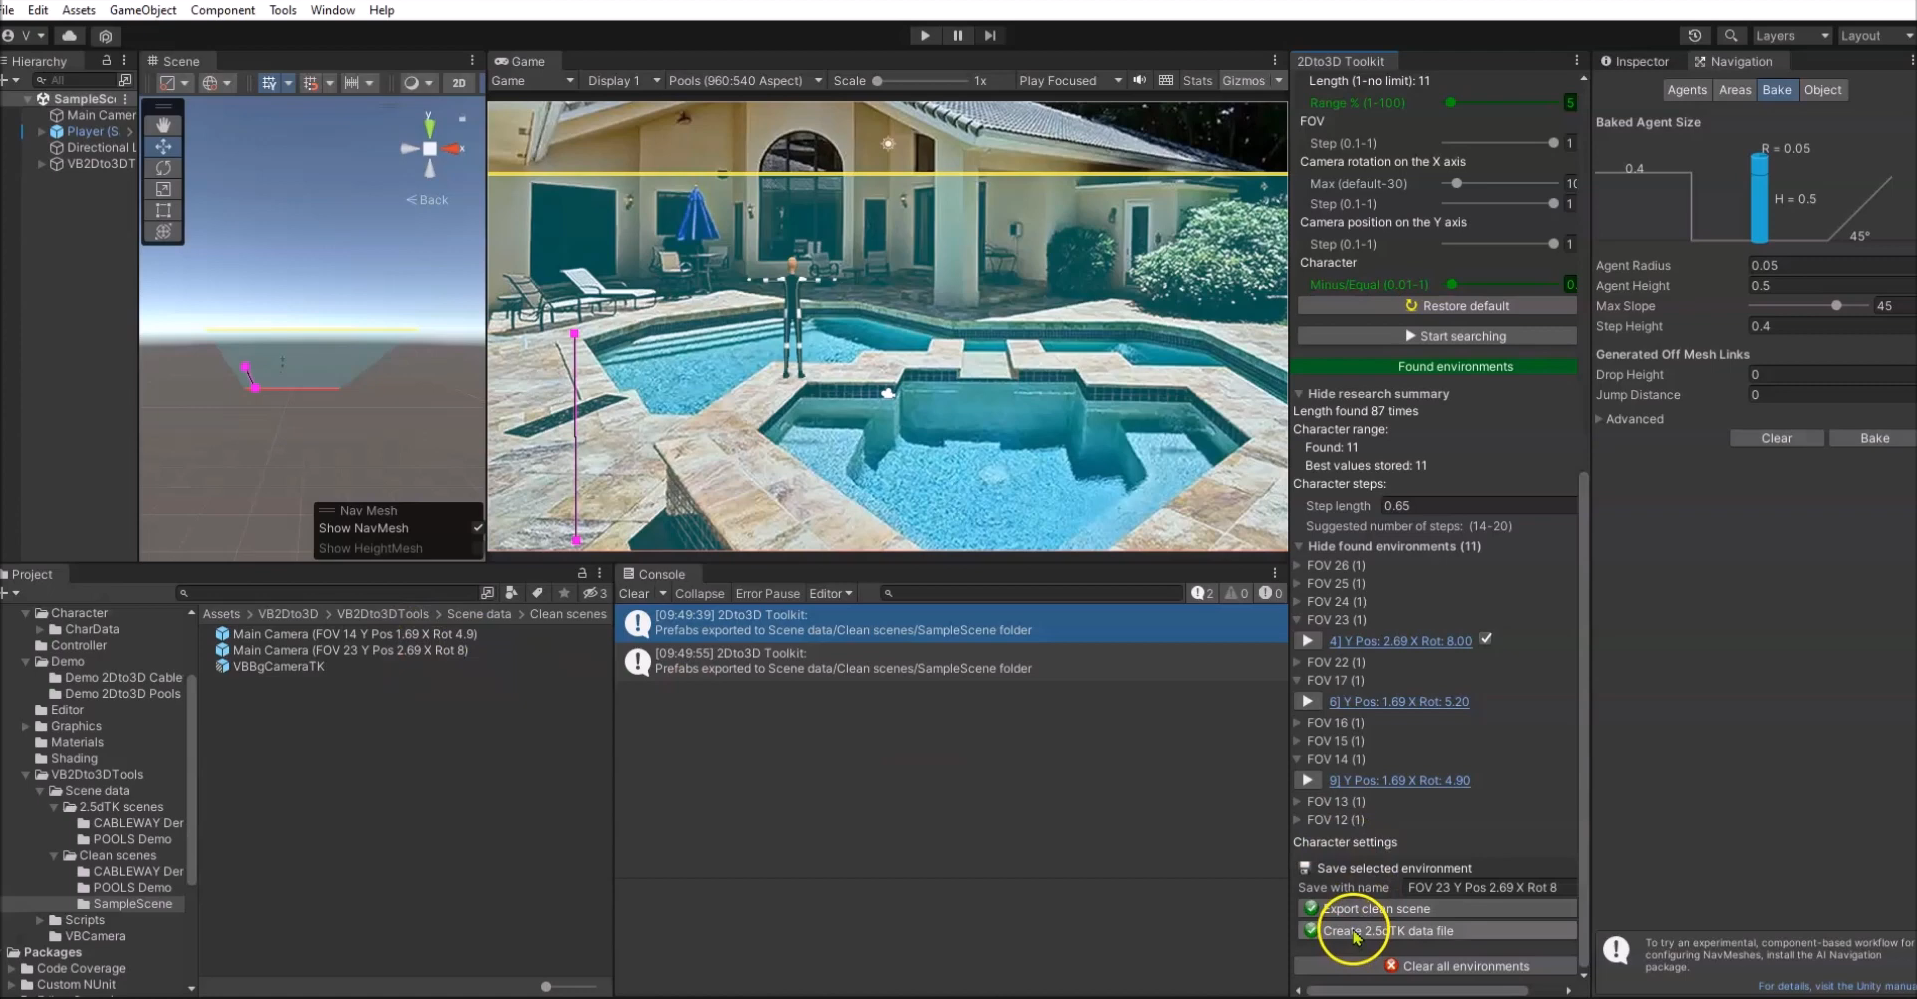
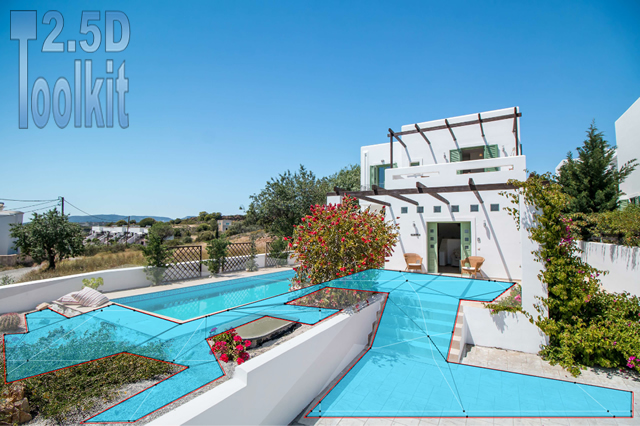
With a FOV of 25, two valid environments are found.
Both use a camera height of 2.68, but with different rotations: 8.1 and 9.1.

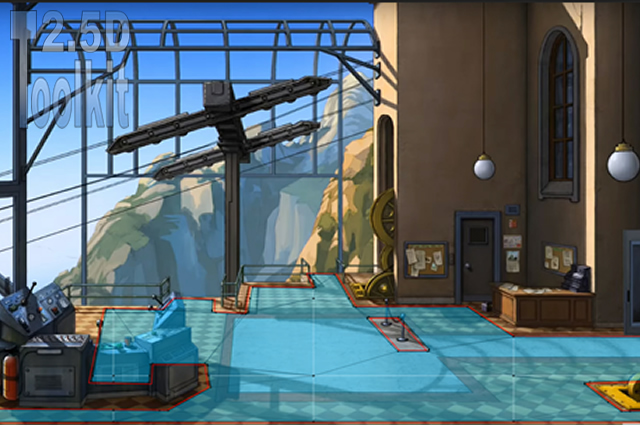
With a FOV of 13, the camera height is 1.68 and the rotation is 4.8.

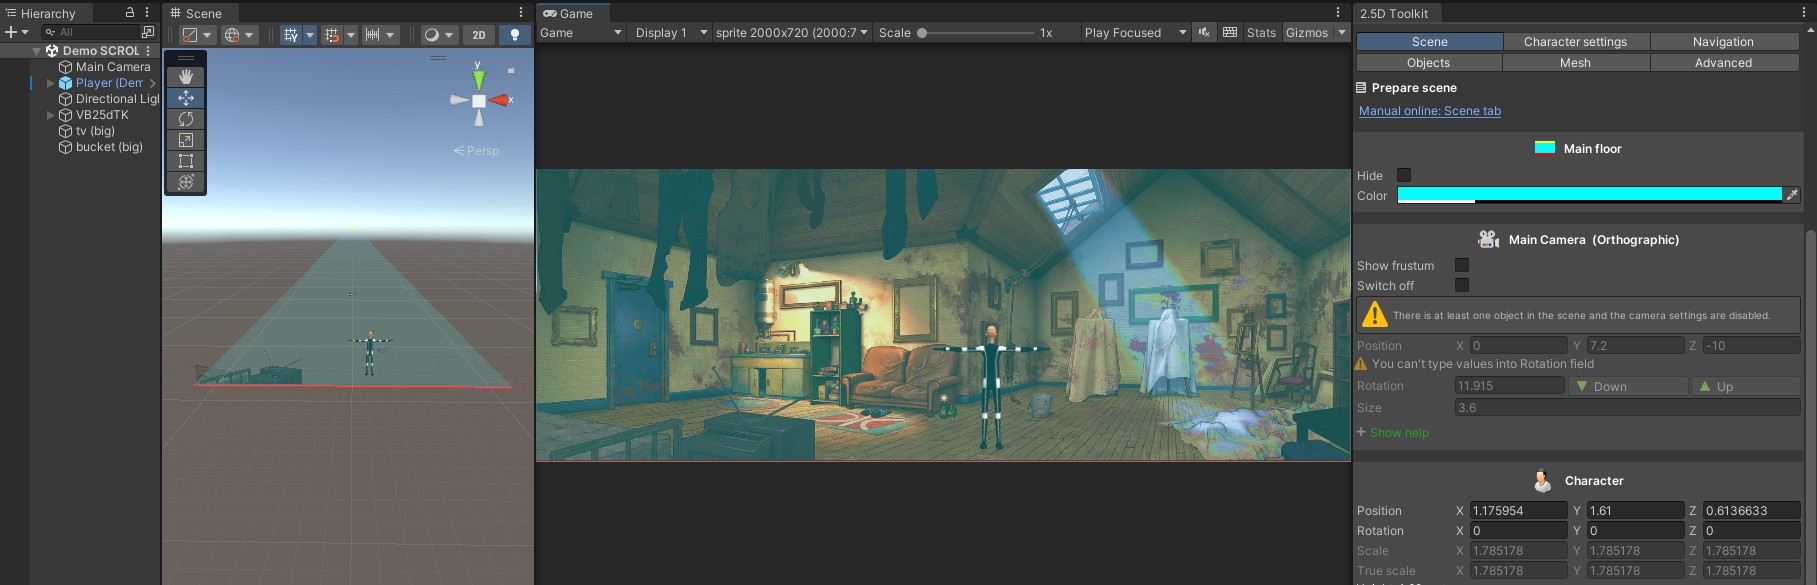
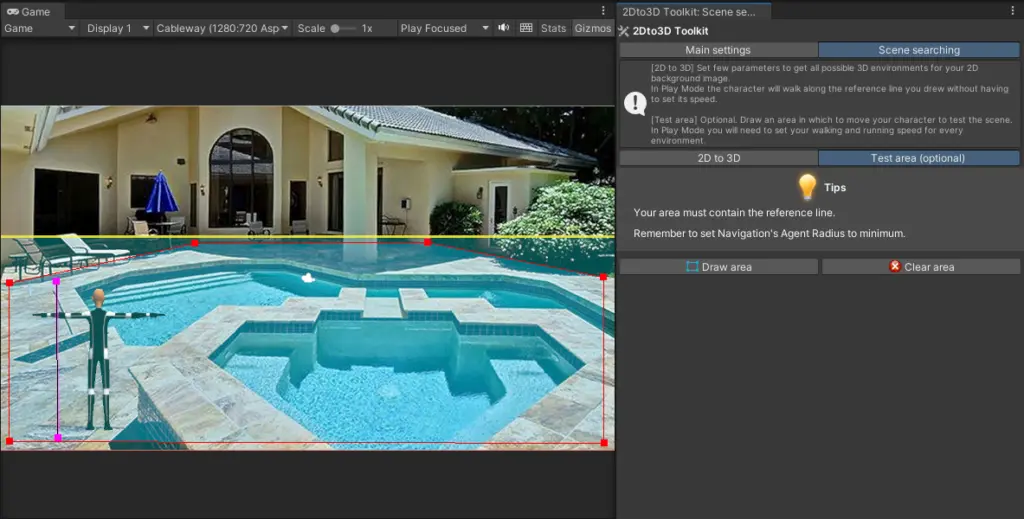
You can click any environment link to apply its camera values to the scene.
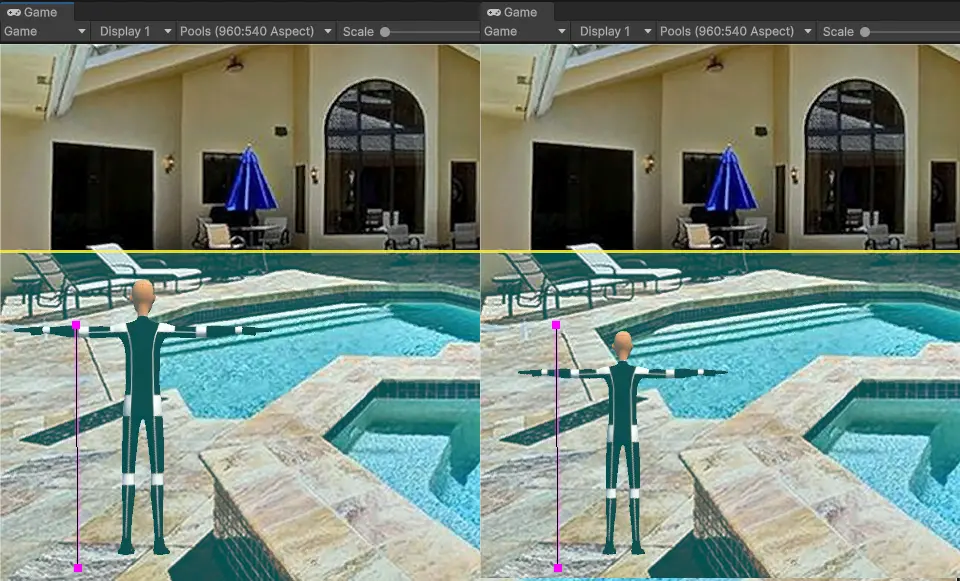
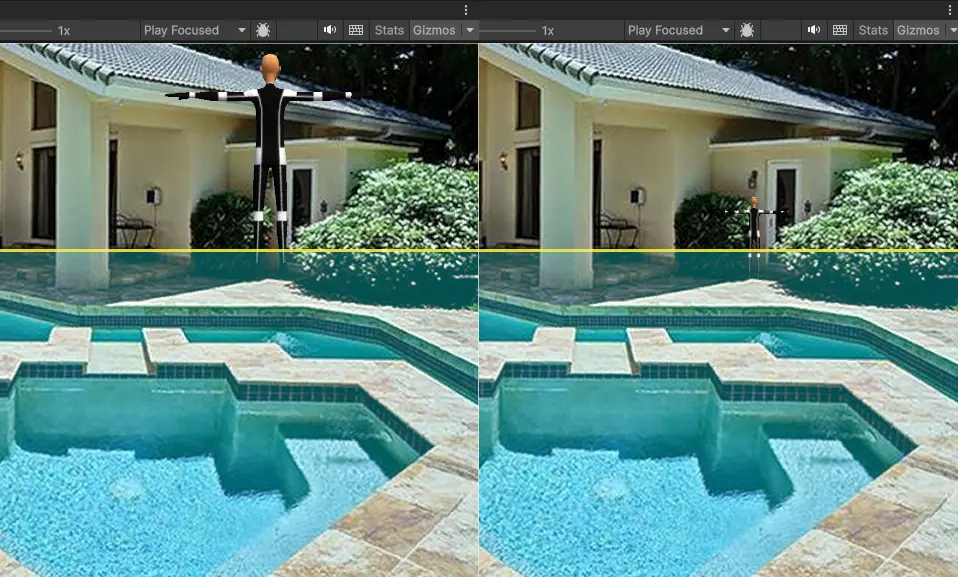
Then drag the character with the right mouse button to verify that it maintains the correct proportions.
Alternatively, you can use the Goto Near Point and Goto Far Point buttons.

Important: depending on several factors – general settings, camera distance, rotation, etc. – the character’s height at the farthest point may vary slightly.
The numerical difference always remains at or below 0.1, but visually it may appear slightly larger.
Choose the configuration that best matches the proportions you want.

Note: some configurations may result in the same number of character steps. In that case, choose the one you prefer.

As expected, depending on the FOV and camera rotation, the character will take more or fewer steps to walk the assigned 10-meter reference line.
We need a scene with a low FOV (to avoid distortion) but one that also results in a realistic number of steps.

Since the character’s speed depends on the scene and must be set manually, testing 23 environments would take time.
For this reason, a helper script assigns the character a temporary BlendTree controller during the testing phase.
This ensures a consistent walking speed across all environments.
Once you identify the best environment, you only need to set the final walk and run speeds once, unless you choose to enable the Use Root Motion option in the character movement script.

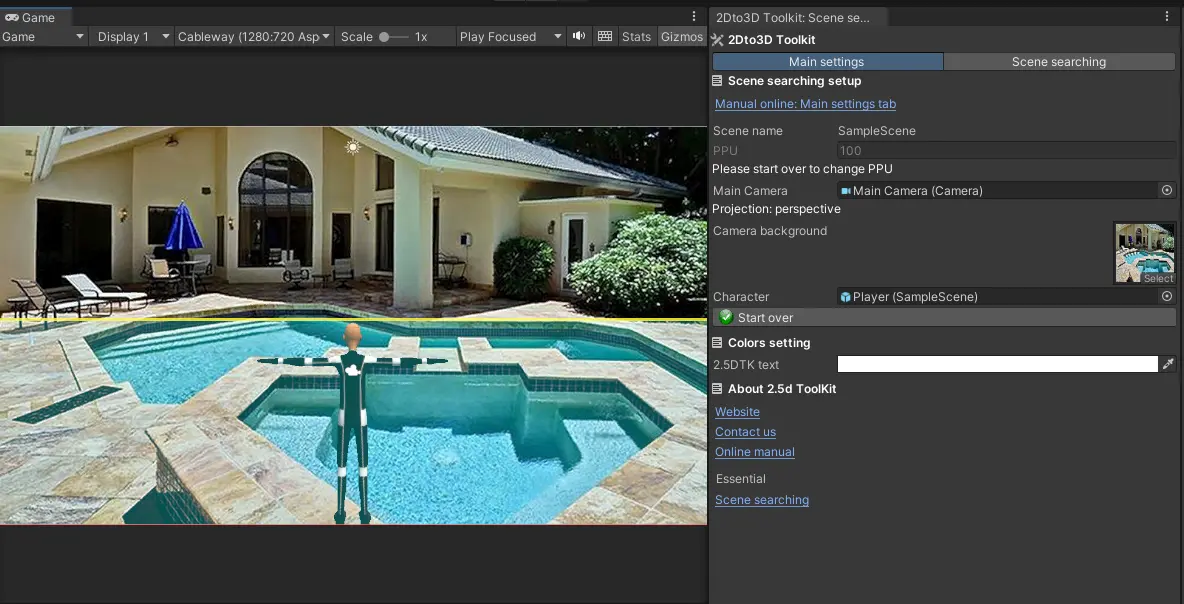
If you prefer, you can use the Test Area (optional) tab and draw the area where the character will walk.
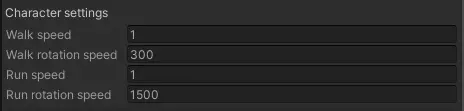
In this case, you must adjust the walking and running speeds separately for each environment.
Directly below the list of environments, you will find the fields to modify these values (visible only in Play Mode).

The two options are not mutually exclusive:
if you have drawn a walkable area, clicking on the NavMesh moves the character, but you can still use the Play button to make it walk along the reference line.

Let’s now test the environments that were found.
Enter Play Mode.

If you click the environment link, the environment is simply applied.
If you click the Play button, the environment is applied and the character is automatically moved to the beginning of the reference line.

After about one second, the character starts walking along the line, and you only need to count the steps.
It stops automatically when it reaches the opposite end and then returns to the starting point.
In the Inspector you will find the recommended number of steps, based on the Step Length parameter, which you can adjust as needed.

During this testing phase, the character cannot be moved with a mouse click unless you have created the test area.

If the results are not satisfactory, you can repeat the search after adjusting its parameters.

Once you have identified the most suitable environment (or environments), return to Edit Mode and click Exit Searching.
All search settings are cleared, but the environments – and the test area, if you created one – are preserved.

Save selected environment

Environments can be saved both in Play Mode and in Edit Mode.

When you click an environment, it is prepared for saving and you can change its name if needed.

The environment is saved in the VB2Dto3D Tools/Scene data folder, inside one of the two predefined subfolders – 2.5dTK Scenes or Clean Scene – depending on your needs.
The save folder uses the name of the current scene, and you can store multiple environments for each scene.

If you need to create a new scene that you will manage manually, choose Export Clean Scene.
In the export folder you will find the prefabs of the Background Camera and all the Main Cameras you chose to save.

Create a new scene, drag the two prefabs into it, and delete the default Main Camera.
Your scene is now ready to be managed.
Remember that the Background Camera requires the VBBackground layer.

If you need to transfer the scene to the 2.5d Toolkit, use Create 2.5dTK Data File.

You will receive a text file containing the camera and character settings.

Create a new scene in the 2.5d Toolkit and initialize it as usual.
Use the same background image, then set the Main Camera and the Character.
You can now create your walkable and non-walkable areas and use the tool as needed.

Legend

Max environments to find

[Number] (integer, 1–100):
Maximum number of environments allowed.
When the limit is reached, the script stops the search and keeps all environments already found.

Reference line

[Length] (float, ≥ 1):
Desired length of the reference line in meters.

[Range ±] (float, 1–100):
Percentage tolerance.
Example: with a value of 5, any measurement within ±5% of the specified Length is accepted.

FOV

[Step] (float, 0.1–1):
Increment used when varying the Field of View.

Camera rotation

The minimum X-axis rotation cannot be defined manually; it is managed automatically by the script.

[Max] (float, from the script’s minimum to 90):
Maximum allowed X-axis rotation.

[Step] (float, 0.1–1):
Increment used when varying rotation.

Camera position

The Y-axis position cannot be defined manually; it is managed automatically by the script.

[Step] (float, 0.1–1):
Increment used when varying camera height.

Character

[Minus/Equal] (float, 0.01–1):
Defines the acceptable difference between the character’s height at the near and far points.
For each configuration, the script scales the character to match the height at the near point and compares it to the resulting height at the far point.
Example: with a value of 0.1, any difference ≤ 0.1 is accepted.

* Button descriptions *

<Store 1st point>
Place the character at a reference point and set its height.
Click to store position and scale.

<Store 2nd point>
Place the character at a second reference point and set its height.
Click to store position and scale.

<Goto the near point>
Moves and resizes the character according to the saved settings.

<Goto the far point>
Moves and resizes the character according to the saved settings.

<Start searching>
Begins the search for all possible environments based on the current settings.

<Stop searching>
Stops the search and keeps all environments already found.