Navigation Tab

This tab changes depending on the scene settings.
If the scene is set to Multi-Level, four additional tabs become available: Manage Level, New Slope, Select Spot, and Staircase.
Orthographic projection does not support multi-level scenes.
From this tab you can draw walkable and non-walkable areas, create new levels, add slopes, and build staircases.

Draw Areas

[Draw in Scene View]
Enable or disable drawing areas in the Scene View or Game View.
Auto-Draw in Scene View performs this automatically.

[Current Level]
Displays the level of the selected area in Multi-Level mode.

[New Walkable Area]
Draw a new walkable area.

  • In Multi-Level mode, it is created on the currently selected level.

[New Not-Walkable Area]
Draw a new non-walkable area.

  • Enabled only when a walkable area is selected.

[Trash Bin]
Delete the selected area.


* Drawing Legend *

Left Click

  • While drawing: insert a new vertex
    You do not need to hold the mouse button to draw.
  • On a vertex: select it to move it

Right Click

  • While drawing: show or hide the tracking line
    If you move the cursor outside the Game View, the tracking line is disabled automatically.
    Right-click inside the Game View to enable it again.
  • On an area edge: insert a new vertex

Middle Click

  • On a vertex: remove it

Double Click

  • On an area edge: select the area
  • Outside an area edge: deselect the area

Manage Levels

  1. Select the starting area.
  2. Drag the Move Area Up/Down field or use the Move Up / Move Down buttons to shift the area.
    • Check the slope angle (in degrees) shown on the slope(s) connected to the area you are adjusting.
    • Also verify in the Scene View that the slope inclination matches what you expect.
  3. Stop when you reach the desired level.

New Slope

  1. Select the starting area and right-click the two vertices you want to connect.
  2. Select the target area and right-click the corresponding two vertices.
    1. Avoid crossing the vertex order.
    2. Keep a clockwise direction whenever possible.
  3. Click Done to create the new area, or Reset to cancel.

Double-click an empty part of the Game View to exit without making changes.

Select spot

  1. Select the area.
  2. Right-click a vertex to select it.
  3. Use the 2.5dTK controls to move the selected vertex.
  4. If you need another vertex to match the same height, select it and click Copy Last Level.
  5. When finished, click Done.

Double-click an empty part of the Game View to exit without making any changes.

Staircase

* Create Staircase *

  1. Select the sloping area from which you want to generate the staircase.
  2. Set the number of steps.
  3. Click Convert.

* Delete Staircase *

  1. Select the staircase.
  2. Click Remove Staircase.
    You will get back the original sloping area.

Edit Tools

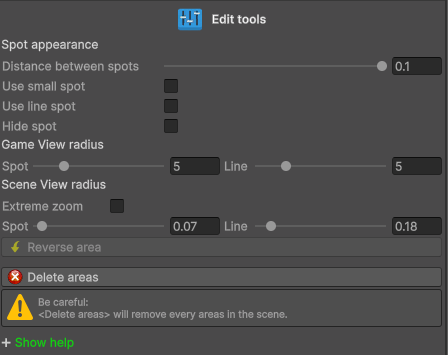
[Distance Between Spots]
Change this value only if you cannot place a vertex at the desired distance from the previous one.

[Use Small Spot]
Depending on your camera settings, you may need smaller vertex markers.

[Use Line Spot]
Draws a vertical line instead of a square for each spot.

[Hide Spot]
Hide all vertices.

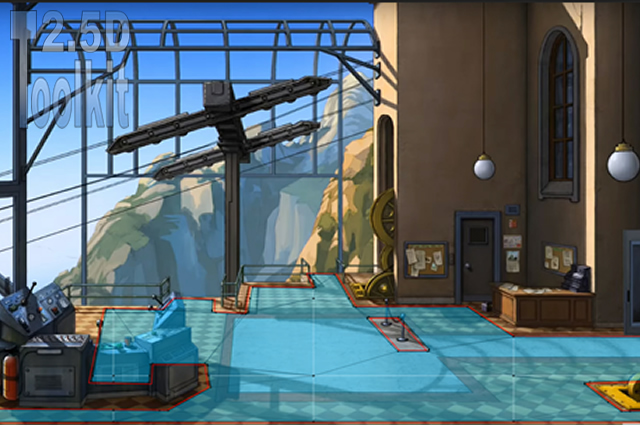
[Game View / Scene View Radius]
When you move the cursor near a vertex or an area edge, they highlight to indicate selection.
Depending on your camera setup or whether you are in Game View or Scene View, you may need to adjust these parameters.

[Extreme Zoom]
In Scene View: if vertices or area edges do not react to mouseover, or if two spots highlight simultaneously, enabling this option provides finer control over the radius.

[Reverse Area]
Reverses the vertex order of the selected area.

[Delete Areas]
Be careful: this will delete all areas in the scene.